
Complete guide to running macOS Ventura with Xcode on Windows with VMware
Before following anything in this guide, please be aware that you may be violating the Terms of Service, License, and/or EULA for Apple and VMware. You will be running Apple software on non Apple hardware and modifying VMware software. You are responsible for reading and accepting any Terms of Service or License agreements that accompany any software you download or install. I wouldn’t recommend doing this on a computer you don’t own, and I REALLY wouldn’t recommend doing it on a work computer.
FYI, running a macOS on any type of X86 (Intel) CPU will likely no longer be an option by somewhere around 2025 to 2027. This includes the VMware method outlined here See here for more details: https://dortania.github.io/hackintosh/updates/2020/11/12/bigsur-new.html#death-of-x86-and-the-future-of-hackintoshing
This guide is designed to show you how to run the latest version of macOS (Ventura) on a Windows PC (in this guide, PC includes desktop, laptop, etc.) with VMware Workstation Player (free product). This is for a new install only. For upgrades, see the links at the top of the page. VMware is a virtualization platform that allows you to run multiple operating systems on a single computer. You will be modifying VMware to add the feature to run macOS on Windows. I’ll also cover settings required to get Xcode working. This guide is for somewhat modern (not ancient) Intel computers. It likely will not work for AMD processors. The primary purpose of this effort is to support a macOS built app that improves the lives of people with a particular medical condition.
If you have a high end modern Windows PC, this setup will run pretty well. If you have an older PC, it will likely still work, but a bit slower. The minimum requirements for your PC are listed here: https://www.vmware.com/products/player/faqs.html
Users are reporting that you won’t be able to run Ventura on a host system with a CPU that is pretty old (pre haswell = Ivy-bridge or Sandy-bridge). I don’t have the hardware to confirm this, but it seems accurate.
It is critical you follow every step in this guide. If you don’t, it will not work. If you don’t get the expected result, you must stop and figure out why. If you proceed anyway, it will not work.
****You will likely have to disable your antivirus program to complete this process. There are no viruses in these files. The process modifies some executable programs (VMware files), and this behavior and technique looks very similar to how a virus might infect your system. You should re-enable your antivirus software when you are done. For Windows defender, see these steps: https://support.microsoft.com/en-us/windows/turn-off-defender-antivirus-protection-in-windows-security-99e6004f-c54c-8509-773c-a4d776b77960
Download all of these files:
1) macOS Ventura VMware disk image: https://www.mediafire.com/file/ohmqyzj5u0xtiyu/macOS_-_MK.zip/file
2) VMware Unlocker/Patch tool: https://github.com/BDisp/unlocker/archive/refs/heads/master.zip
3) VMware Workstation Player for Windows (currently 17.X): https://www.vmware.com/go/getplayer-win
Installation
Step 1: Extract the macOS VMware disk image file
Browse to where you saved this file “macOS – MK.zip”, and extract it with the Windows Utility. It may take while, so you can proceed to the next step while it is running. Just don’t reboot (if asked) until this step is complete. After it is complete, you can delete the original zip file “macOS – MK.zip”

Step 2: Install VMware Workstation for Windows
Install VMware, the 3rd file you downloaded above. 
I would uncheck these 2 boxes. The rest of the default options should be fine. 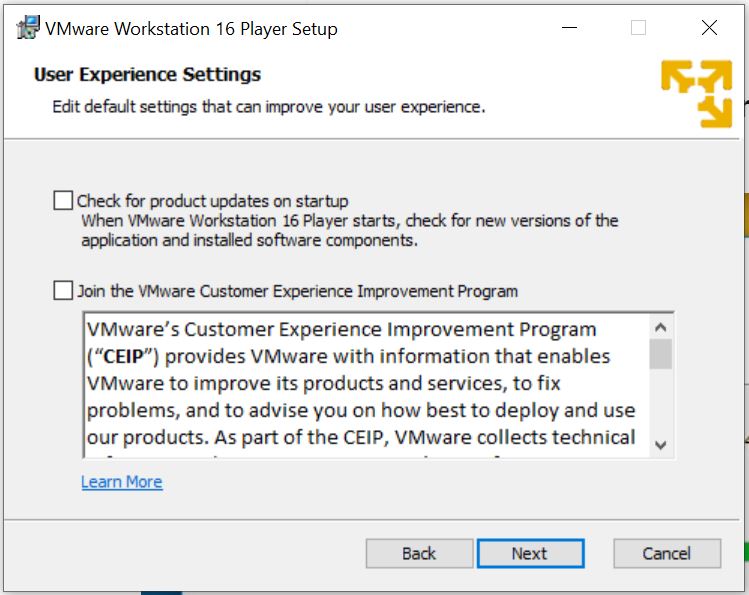
Step 3: Patch VMware
This is a crucial step. It is frequently overlooked. If it is not completed successfully, you will not be able to proceed. Extract the previously downloaded “VMware Unlock/Patch tool”. Browse to the extracted files, and right click “win-install.cmd” and select Run as Administrator. Pay attention to any output you see on your screen. This must be run successfully. If you get any antivirus/Windows Defender warnings, you need to pick the option to continue.


Step 4: Create Virtual Machine
Open the installed VMware player and click on “create a new virtual machine”.

The new virtual machine wizard will be opened. Choose to install the operating system later from the options and click on “Next”. In the next page, choose the Guest operating system which in this case is Apple Mac OS X and then Version macOS 12.0. Click on the “Next” button.

In the next screen, name the virtual machine (whatever you want) and choose where it is to be stored by browsing to the location. Any LOCAL (not cloud) disk is fine. Click on the “Next” button. On this screen, specify the storage space to be allocated to the virtual machine. For now, allocate just 1 GB. It is temporary and it will be removed in subsequent steps. Choose “Store virtual disk as a single file” and click “Next”. Confirm everything and click on “Finish”.

Step 5: Edit the Virtual Machine
Open VMware and select “macOS” (or whatever you named it). Click on “Edit the virtual machine”
Select the Memory tab. You want to choose about half of the available memory on your PC. You can adjust this later. If you have a lot of RAM on your PC (12 GB, 16 GB, more) you can be generous here. The key is you have to leave at least 4 GB or so of RAM for your PC to use, but the more you are able to give to the macOS, the faster it will be.
Set the CPU cores to an appropriate setting. If you have 8 cores, 4 would be great. This is similar to Memory. You want to give it enough to perform well, but you can’t starve your Windows machine to the point where it can’t function. Uncheck all boxes as shown. Click “OK” to accept the changes.
In the list of devices, choose the “Hard Disk” on device menu option. Click on “Remove” button. This removes the virtual hard disk created when first creating the virtual machine. 
Then click “Add”. 
To make a new virtual disk on VMware, click on Hard Disk on the list of devices then choose “SATA” followed by “Use an Existing disk”.

To select the disk, use the browse button to open the location where the “macOS-MK.vmdk” file is stored (ignore file name in screenshot below). Select it and click on “Finish”. 
It should default to a 120 GB hard drive (ignore the 80 GB shown in the screenshot). You need 120 GB to have everything work well and not go through a massive hassle every time you do a Xcode or OS update. If you want to go larger than 120 GB, you can specify a larget size, and make sure to see Step **9 when you are done.

Step 6: Edit virtual network adapter
This is a new step that wasn’t needed in previous versions. It isn’t a hack or anything similar. Ventura doesn’t appear to work with the default virtual network adapter in VMware. We need to change it to a new one, but this option isn’t available in the VMware interface. We will have to edit a config file manually. The configuration files are stored in the working directory for your virtual machine. Right click on the virtual machine, select settings, then the options tab. Look for the Working directory folder. You can highlight the entire path and copy it.

Navigate to that directory. Look for ‘macOS – MK.vmx’ (or whatever you named your VM). You may not see the .vmx extension. That is fine. The file Type will be ‘VMware virtual machine configuration’ and it will be around 4 KB. Right click the file, and select Open With. If you don’t see an option for Notepad, select Choose Another App, and then select Notepad.

You want to find this portion of the config file:

Search for ethernet0.virtualDev. Change it from ethernet0.virtualDev = "e1000e" to ethernet0.virtualDev = "vmxnet3"
Save and close the config file.
Step 7: Play macOS Ventura
Open the VMware player if you had closed it and click on “play virtual machine”, and create a new account. If you get a SATA warning, you may ignore and dismiss it. 
If/when you see this message about VMware tools, choose never remind me.

The rest of the options are your preference. They are the same you would see on a normal mac. Assuming you aren’t migrating from an exiting device (I wouldn’t), you will need to select this option. 
Step 8: Install VMware Tools on Virtual Machine
In VMware Player, click Player, Manage, Install VMware Tools. Then click on “Install VMware tools”. If that hasn’t popped up, click on the VMware Tools Drive on the top right. The default options are fine. 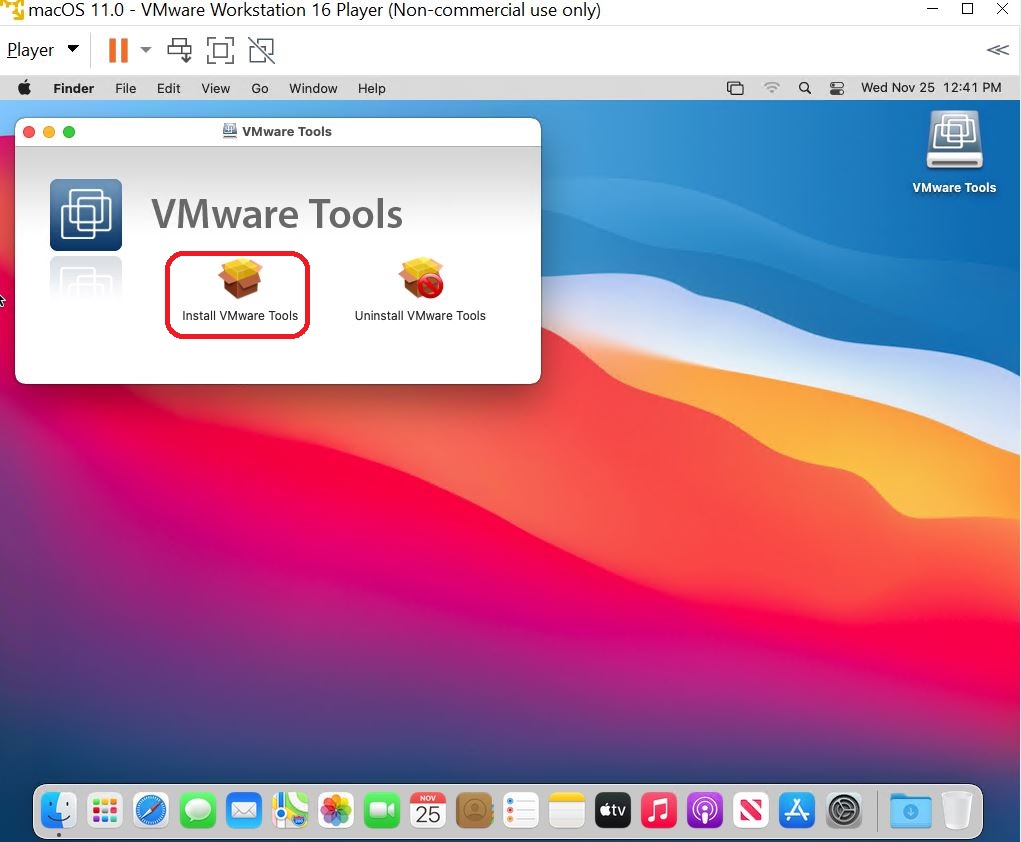
You will see these screens in the sequence shown below. On picture 2, you will click the lock symbol to unlock it, and then you will be able to click the allow button. You can the click the option to restart. 
Step **9: Expand MacOS partition
You only do this step if you expanded your your virtual disk beyond the default 120 GB. If you did, follow these steps. If you left it at 120, proceed to “You are done…” below.
1) Open terminal by pressing Command + space bar to open the Spotlight Search bar (the Mac Command key is the same as the Windows key)
2) Type Term in the Spotlight Search bar and select Terminal to open the Terminal window
3) Copy and paste this command into Terminalsudo diskutil apfs resizeContainer disk1 0
4) When prompted, enter your Mac password and press Enter. Please note that it will appear as if you’ve typed nothing on your screen, but if you type in your password properly, you should start to see various lines of code start to appear in Terminal.
5) Wait patiently while your hard drive expands on your Virtual Mac. Ultimately, you will get a message that you’ve Finished APFS operation.
6) Click on the Apple icon in the upper left corner and select About This Mac – Storage to confirm your success! You can now close Terminal.
You are done installing and configuring. You now have a running instance of macOS.
Connecting your iPhone
You can connect your iPhone (or iPod Touch) to a USB port on your PC. If VMware is open, you will receive a prompt asking how you want to handle your removable device.

Choose whichever option you like. Eventually, it will have to connect to the Virtual Machine.
If you don’t connect it to your VM initially, you will see a grey iOS icon in the top right corner of your VMware session. If it has a green dot on it, you are all set.

If it is not connected, you just need to connect it. right click the icon, and select the option to connect. 
This is what it should look like when your iPhone is connected to your macOS VMware session.
Your iPhone must be visible to macOS to connect to it in Xcode. If you are having trouble accessing your iPhone is macOS, verify it is accessible in iTunes as a test.

Now you have macOS running with an iPhone connected. Your hardware is now ready to work in conjunction with Xcode to deploy an application to your iPhone.
Additional notes:
You can normally apply minor updates to macOS. Make sure not to update to a version not supported by other components you may be using this solution for.
You can install VMware updates, but you will have to run the Patch/Unlocker script again after the update. Do not update to a new major version such as going from 16 to 17 without confirming it is supported
