Complete guide to do a backup and restore of macOS (currently Catalina) on Windows with VMware
Before following anything in this guide, please be aware that you may be violating the Terms of Service, License, and/or EULA for Apple and VMware. You will be running Apple software on non Apple hardware and modifying VMware software. You are responsible for reading and accepting any Terms of Service or License agreements that accompany any software you download or install.
It is always possible that you could have your virtual machine crash and become unbootable for some reason or another. It happened to be today because my Windows host decided to do a windows update in the middle of a VMware session where my macOS machine was doing an XCode build. Windows machine crashed for some reason, obviously macOS virtual machine crashed, and it was not recoverable. I had done a backup, so today is the day I got to test it, and then document it for others.
It is a good idea to perform a backup of a virtual machine that is exactly how you want it, and it would be a good point to recover to. It could also be a good idea if you are about to make major changes to your virtual machine (updating macOS for instance).
Backing up your existing virtual machine
- Make sure your virtual macOS machine is shutdown
- Open VMware, right click on your macOS VM and click settings
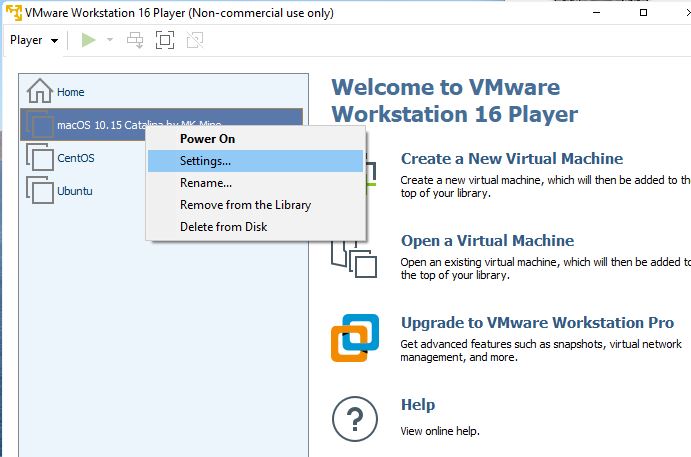
- Click on Hard Disk, and look at the text in the Disk file field on the right. Highlight the text showing the folder your virtual machine is in. This should be the folder your virtual machine files are stored in. This will likely be the last section before the word “macOS” In my case, it is “C:\VirtualMachines\” Copy this text to your clipboard. Your path may be something like “C:\Users\<your name>\Documents\Virtual Machines\”

- Press the Windows Key + R on your keyboard (while holding the Windows/Start key on your keyboard, press the R key). This should open the Run command. Paste in the directory you have on your clipboard, and hit enter or click OK

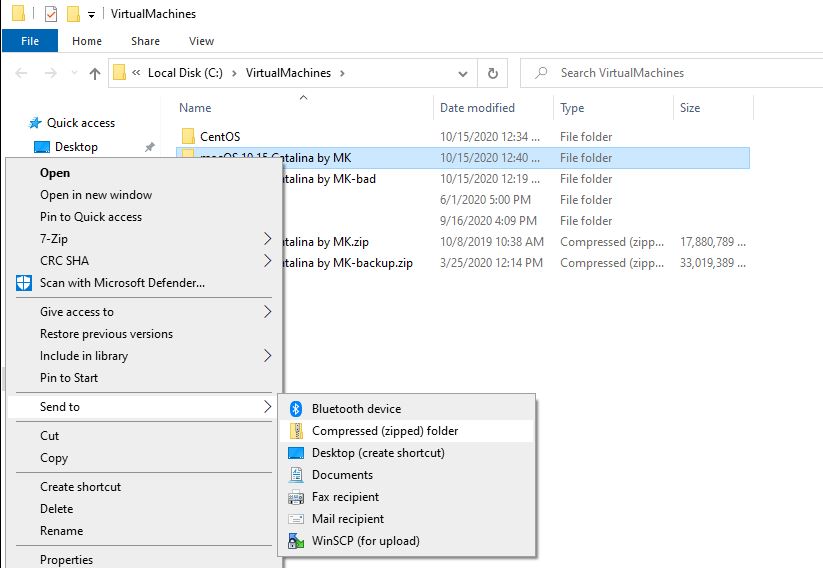
- Locate the folder representing your macOS virtual machine. It will likely be the only folder. In my example, there are other folders for other virtual machines I have (and for a backup).

- Rightly click the folder, and select Send to, and then Compressed (zipped) folder. It will default to creating the file in the same folder. If you would like more advanced options including selecting a different folder or drive (External would be a good idea), downloadd a third party compression utility such as 7-Zip. **If you have A LOT of free space, you can simply copy the folder instead of zip’ing it.
- That is it. It may take a long time to complete. It could take hours on a slower computer. You should now have a single file called something like “macOS 10.15 Catalina by MK.zip”. Safe that somewhere. That is your backup. An external drive might be a good idea.
Restoring a Virtual Machine from a backup
- This assumes the backup was taken in the exact manner outlined above. Make sure you have a backup and understand you will be deleting your current (presumably broken) macOS virtual machine.
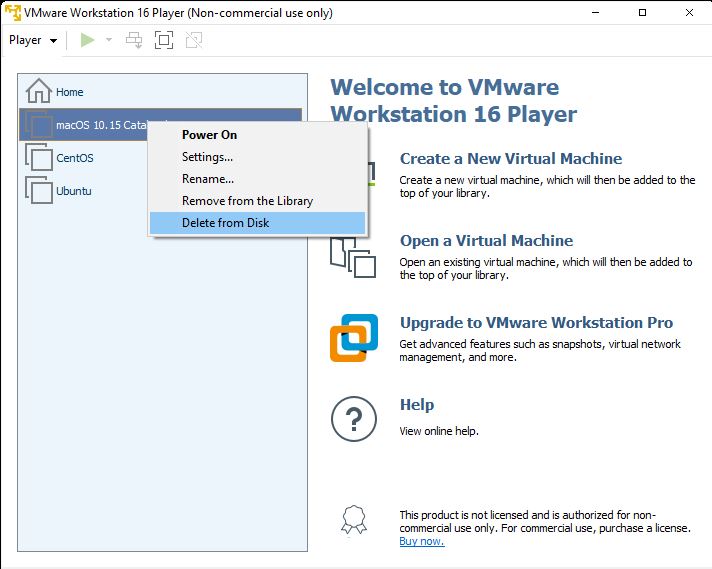
- Open VMware. Right click on your macOS virtual machine, and select “Delete from Disk”. You will get a confirmation asking if you want to do this.
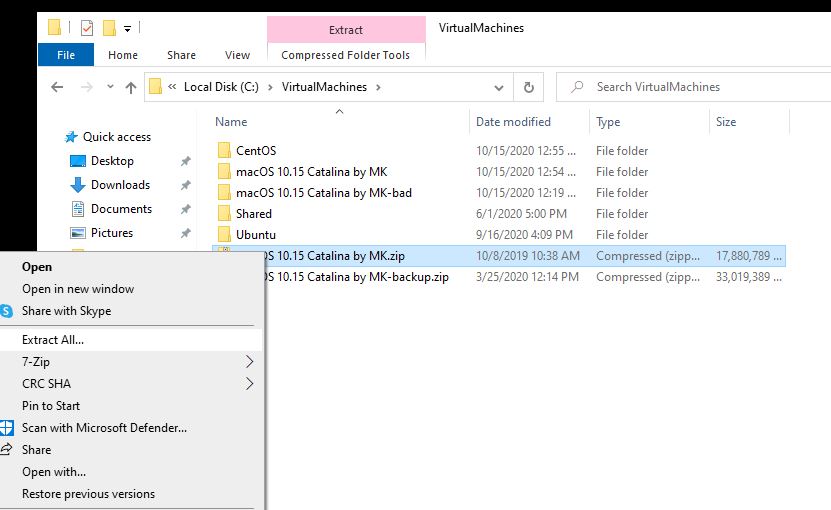
- You now need to extract your backup to this same folder. If you left it in this folder from when it was taken, simply right click, and select “Extract All”. If you stored the backup somewhere else, you will need to get the extracted files to this folder. This could take hours to extract.
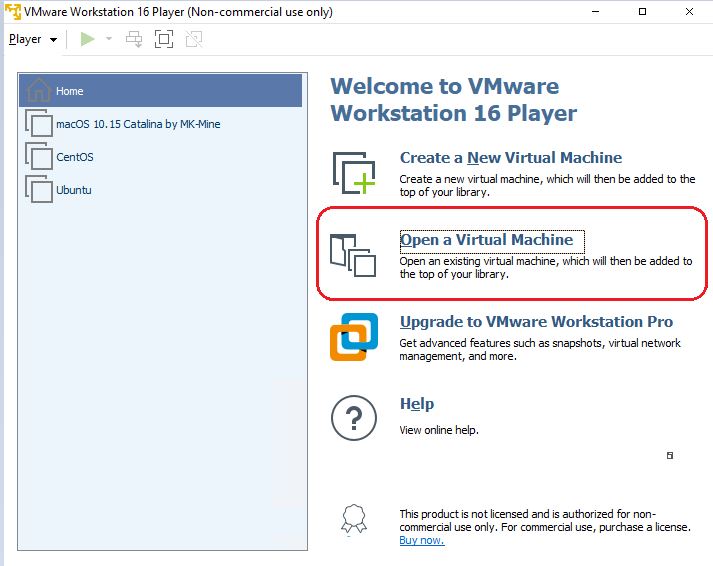
- When the extract is complete, open VMware, and click “Open a Virtual Machine”
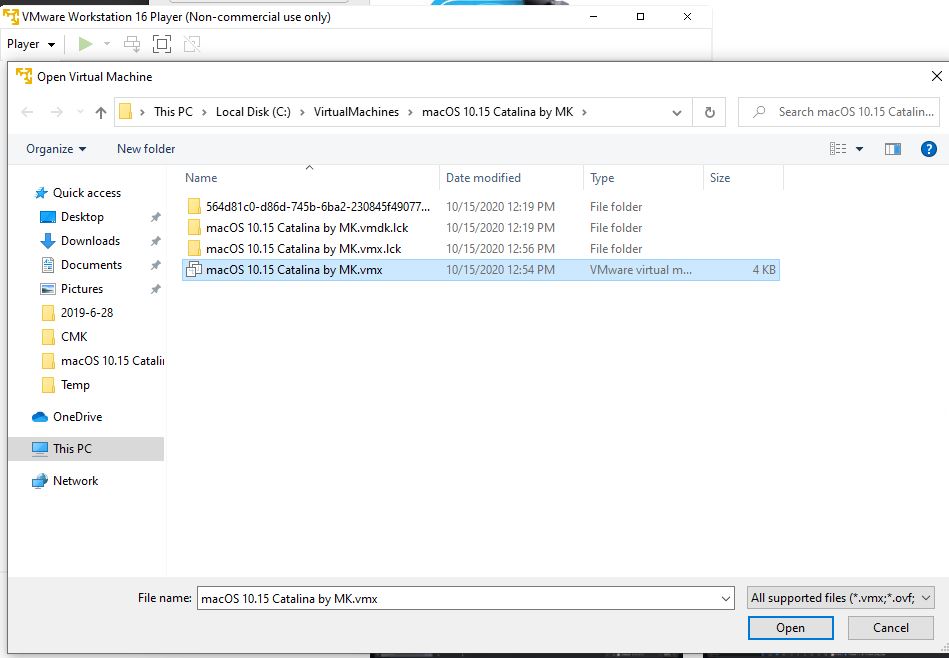
- Select the VMX file associated with your machine. It is possible you will have to navigate to this folder and the extension of this file may be hidden. Don’t worry. It won’t allow you to select the wrong type of file or do anything destructive.
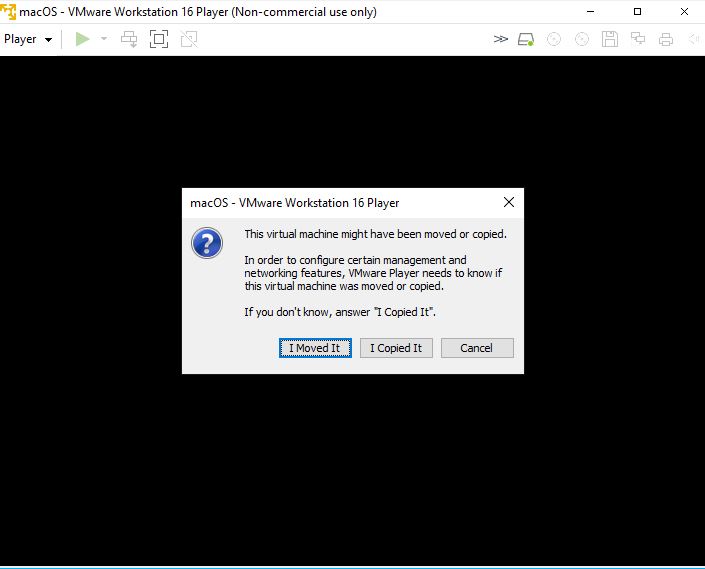
- Once it is complete, you should now have a “New” macOS virtual machine in VMware. You can now start this machine. You will likely see a prompt asking if you Moved or Copied the virtual machine. I recommend selecting “I Moved It”
- That is it. It should boot up, and be a perfect snapshot of whenever you took your backup.

Is there any chance you have documented how to increase the size of hard drive space allocated to Catalina virtual machine? I have already set up but now realize I should have specified a larger hard drive. THX!
LikeLike
Yes. If you look at the Big Sur build page, it has the steps. They are the same for Catalina.
LikeLike